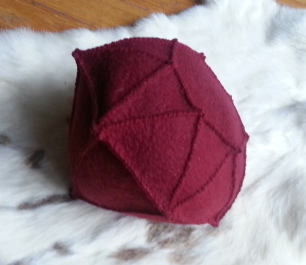
So gSchool, yo. We have Retrospectives on Thursday… we draw a happy face, question mark and sad face on the board. Each person takes a turn and adds something to the board in one of those columns. To indicate whose turn it is, we pass around the GOpher… but wait a minute, we aren’t studying GO, we are studying Ruby. We need a freaking ruby!
Well, a bit of Googleing and Amazoning turned up nada. How are there no stuffed gems? Not even a sewing pattern that I could find. You know what happens next.
So I began with the obvious, Wolfram Alpha. Since 7 is a sacred number, I knew I wanted to try making a septagon based gem. How long is each side of a septagon that is 4 inches across? From there, I just sketched out my idea of parts.
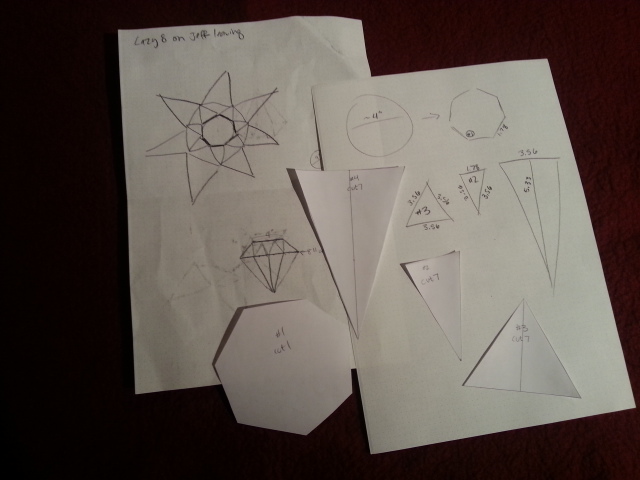
So from my idea of the size of the face of our ruby, I started making the pattern pieces. The outer diameter of the ruby was going to be about 8", so my #3 pieces were going to be equilateral triangles: 8" * 3.14159 / 7 triangles on each side… about 3.5 inches. Then the #2 triangles need to be 1.8 inches along the base with the same length other two sides as the equilateral. Finally, the #4 triangles need a 3.5 side as well, with a height of about 5.3 inches. This beautiful ruby will be made of wool felt and metallic embroidery floss from Fancy Tiger. Also, I am a huge fan of prewashing felt, it makes it look a bit more rumply and authentico.
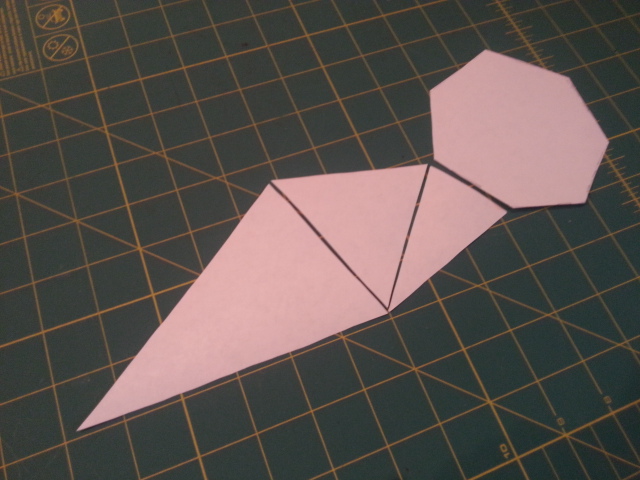

First I cut out all the pattern pieces and made sure I didn’t throw spaghetti in my calculator or whatever. Looks like they all fit together, so next cut them out of felt. Cut 1 of the septagon, and 7 of each of the triangle pieces (3 different pattern pieces = 21 total triangles).
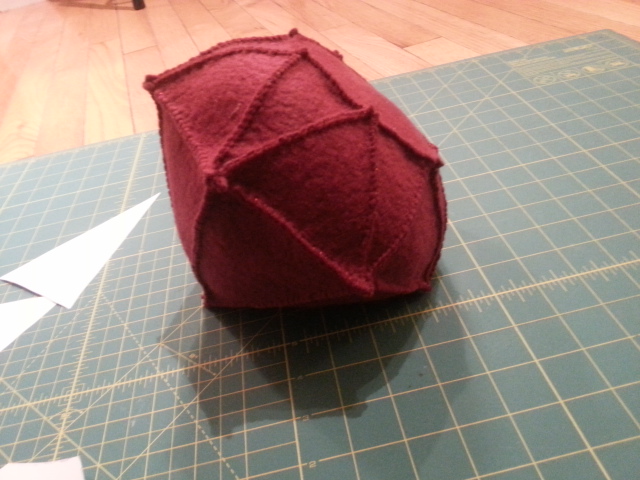
I did use metallic embroidery floss from DMC, which is a total pain to use. I cut about 1 yards and separated it out into it’s 6 strands and used one strand for all the seams. I started with the #2 and #3 triangles and sewed them together alternating as shown in the diagrams and finally joined it into a ring. Then I sewed this ring onto the topmost face, piece #1.
For the second step, all the #4 triangles are sew together. Once they are all together, sew the top piece to the bottom piece… until you have two sept sides open. Stuff the ruby and finish your seam.
Tada!